
This time, I received the little brother of the previous test subject, the Legend 3, for testing from Sourcemore, which is none other than the Geekvape Aegis Solo 3! It is also available in a version with a built-in battery, which houses a 3000mAh battery, but the variant with a replaceable battery arrived with me. Just like in the Legend 3, this one also features the latest AS Chip 4.0, thanks to which the output voltage remains stable even when the battery is running low. This means the same as in the case of the Legend 3, namely that it optimizes performance to keep the flavor consistent even at the very end of the battery life. Of course, it provides protection against overcharging, over-discharging, overheating, short circuits, and reverse polarity. Furthermore, as usual, it is resistant to water, dust, and shocks, which is the IP68 rating, also known as Tri-Proof. In fact, it does the same things as the Legend 3, just a bit differently, due to its single-battery design.

The Solo 3, made of aluminum-zinc alloy and silicone, is available in the same 10 colors as the Legend 3, which are blue, gold-blue, red, titanium grey, purple, rainbow, green, dark grey, silver, and black. Since the Solo 3 is a spitting image of the Legend 3, it also arrived with me in a silver finish, just so they would match. The colors and tones are perfectly identical, as is the functionality, so you can truly expect only very minor differences compared to the Legend 3. But let’s see what these differences are.
Geekvape Aegis Solo 3 Review
Box Contents and Getting to Know the Device
There’s nothing extra in the box, just the usual USB cable, which we will naturally only use for software updates if we have the opportunity later, along with the user manual, an info card for the device, and of course, the indispensable Warning card, which explains the basic things, such as not using the product for anything other than vaping!

On the front, we find a bio-sensor fire button, the 0.96-inch TFT display, and below that, the two-way navigation buttons. The fire button will be the most interesting here, as it only activates by touch, but I will explain this in more detail below. The mod displays the usual information, which includes the battery charge status, the mode name with its characteristic animation below it, followed by the Watt value, the Ohm reading, the currently delivered Volt value, and finally the puff count, which first shows the draw duration and then, after 1 second, displays the puff count.

The side is no different from the Legend 3; the Geekvape lettering adorns the casing in the same way, it has just become narrower due to the single-battery design. On the back, under the Aegis Solo 3 lettering, you will find the Smart sensor, just like on its big brother, which also embodies the electronic palm recognition system. This activates the Touch Lock, which is still my favorite Geekvape feature! When we pick up the Solo 3, the entire device unlocks, and if we put it down somewhere and don’t touch it, it locks all the buttons.

The 510 connector hasn’t really changed either, only differs slightly in size, as the Solo 3 measures 39.2 x 28.2mm from a top view. So, it can accommodate tanks with a maximum diameter of 28mm, which will still overhang slightly, just like the DR Solo did on the Legend 3, but with the Solo 3, it will overhang not only at the sides but also towards the back. I placed the Chariot 23 on the Solo 3, which is exactly the size of the upper grey ribbed part, without the curves. In my opinion, tanks with a diameter of 22-23mm will be the best choice for the Solo 3. The 28mm becomes relevant if, for example, a 26mm tank were to fall over, its glass tube would (in theory) not break. I wouldn’t risk it anyway; the Solo 3 will be most suitable for MTL and RDL, so tanks between 22-24mm will be perfect for it. Of course, this is strictly my personal opinion, which I will explain shortly! The three screws ensure the solidity of the 510 connector. The small ribs touching the entire surface of the 510 somewhat help prevent the tank from getting stuck.

On the front top of the Solo 3, as usual, we find the USB connector, protected from water and dust by a silicone rubber plug. It can charge the battery at 5V/2A, if you absolutely have no other option to charge the battery, but it’s better to carry spare batteries everywhere! Due to the single-battery design, 5V/2A is sufficient (perhaps even too much), but in contrast, the Legend 3 can charge batteries in pairs with 5V/3A. So, in terms of specifications, the first real difference is the input voltage!

The screw-on battery cap is located at the bottom of the mod, which is quite a substantial piece, so it will withstand rough handling. In the past, this type of design was characterized by the flip-out semicircle used to unscrew the battery cap breaking off easily. However, in this case, it is so robust that this is unlikely to happen. I’d like to circle back to the point about tipping over and breaking glass. Since the base of the mod is semi-rounded, it tends to wobble if placed down incorrectly. This is why it’s important not to put tanks with a diameter of exactly 28mm on it, but smaller ones, so that if it accidentally tips over (it sometimes tipped over for me), the glass doesn’t break!

While we’re still discussing the external features, let’s look at the size differences as well, because there’s a slight one. The dimensions of the Legend 3 are: 88.5 x 54 x 28mm, and the dimensions of the Solo 3 are: 86.9 x 39.2 x 28.2mm. I think the dimensions have been perfectly hit for both mods.

Now let’s see what the AS Chip 4.0 offers. With the usual 3 quick presses of the fire button, we can enter the menu, where we can adjust the modes, the device locking method, reset the puff counter, change colors, and even lower the brightness. The latter is set to 100% by default. Finally, we can also check the version number here and reset the Solo 3 to factory settings.

As I mentioned above, we can also tweak the modes, so the first is the Mode menu item, where we can find Smart, Power, Boosting, Memory, Eco, and finally the TC-TCR mode.
The second is the Lock Settings menu item, where we can choose from Touch Lock, Button Lock, and Unlock options. If we choose Touch Lock, we unlock the device by touch, and lock it without touch. But it’s not just the Smart sensor on the back of the device; as I’ve already mentioned, there’s a bio-sensor in the fire button, which, unlike the Smart sensor, is not pressure-sensitive (doesn’t fire). It only fires when it senses body heat, so even if it gets pressed in a bag, it won’t fire because it requires human touch. A very sentimental little button! If we choose Button Lock, we only lock the bottom two navigation buttons. This is not secure, as the fire button remains active and will fire if anything presses it. However, we can also choose the option not to lock any buttons at all with the mod; that’s what Unlock is for. Though safety is paramount!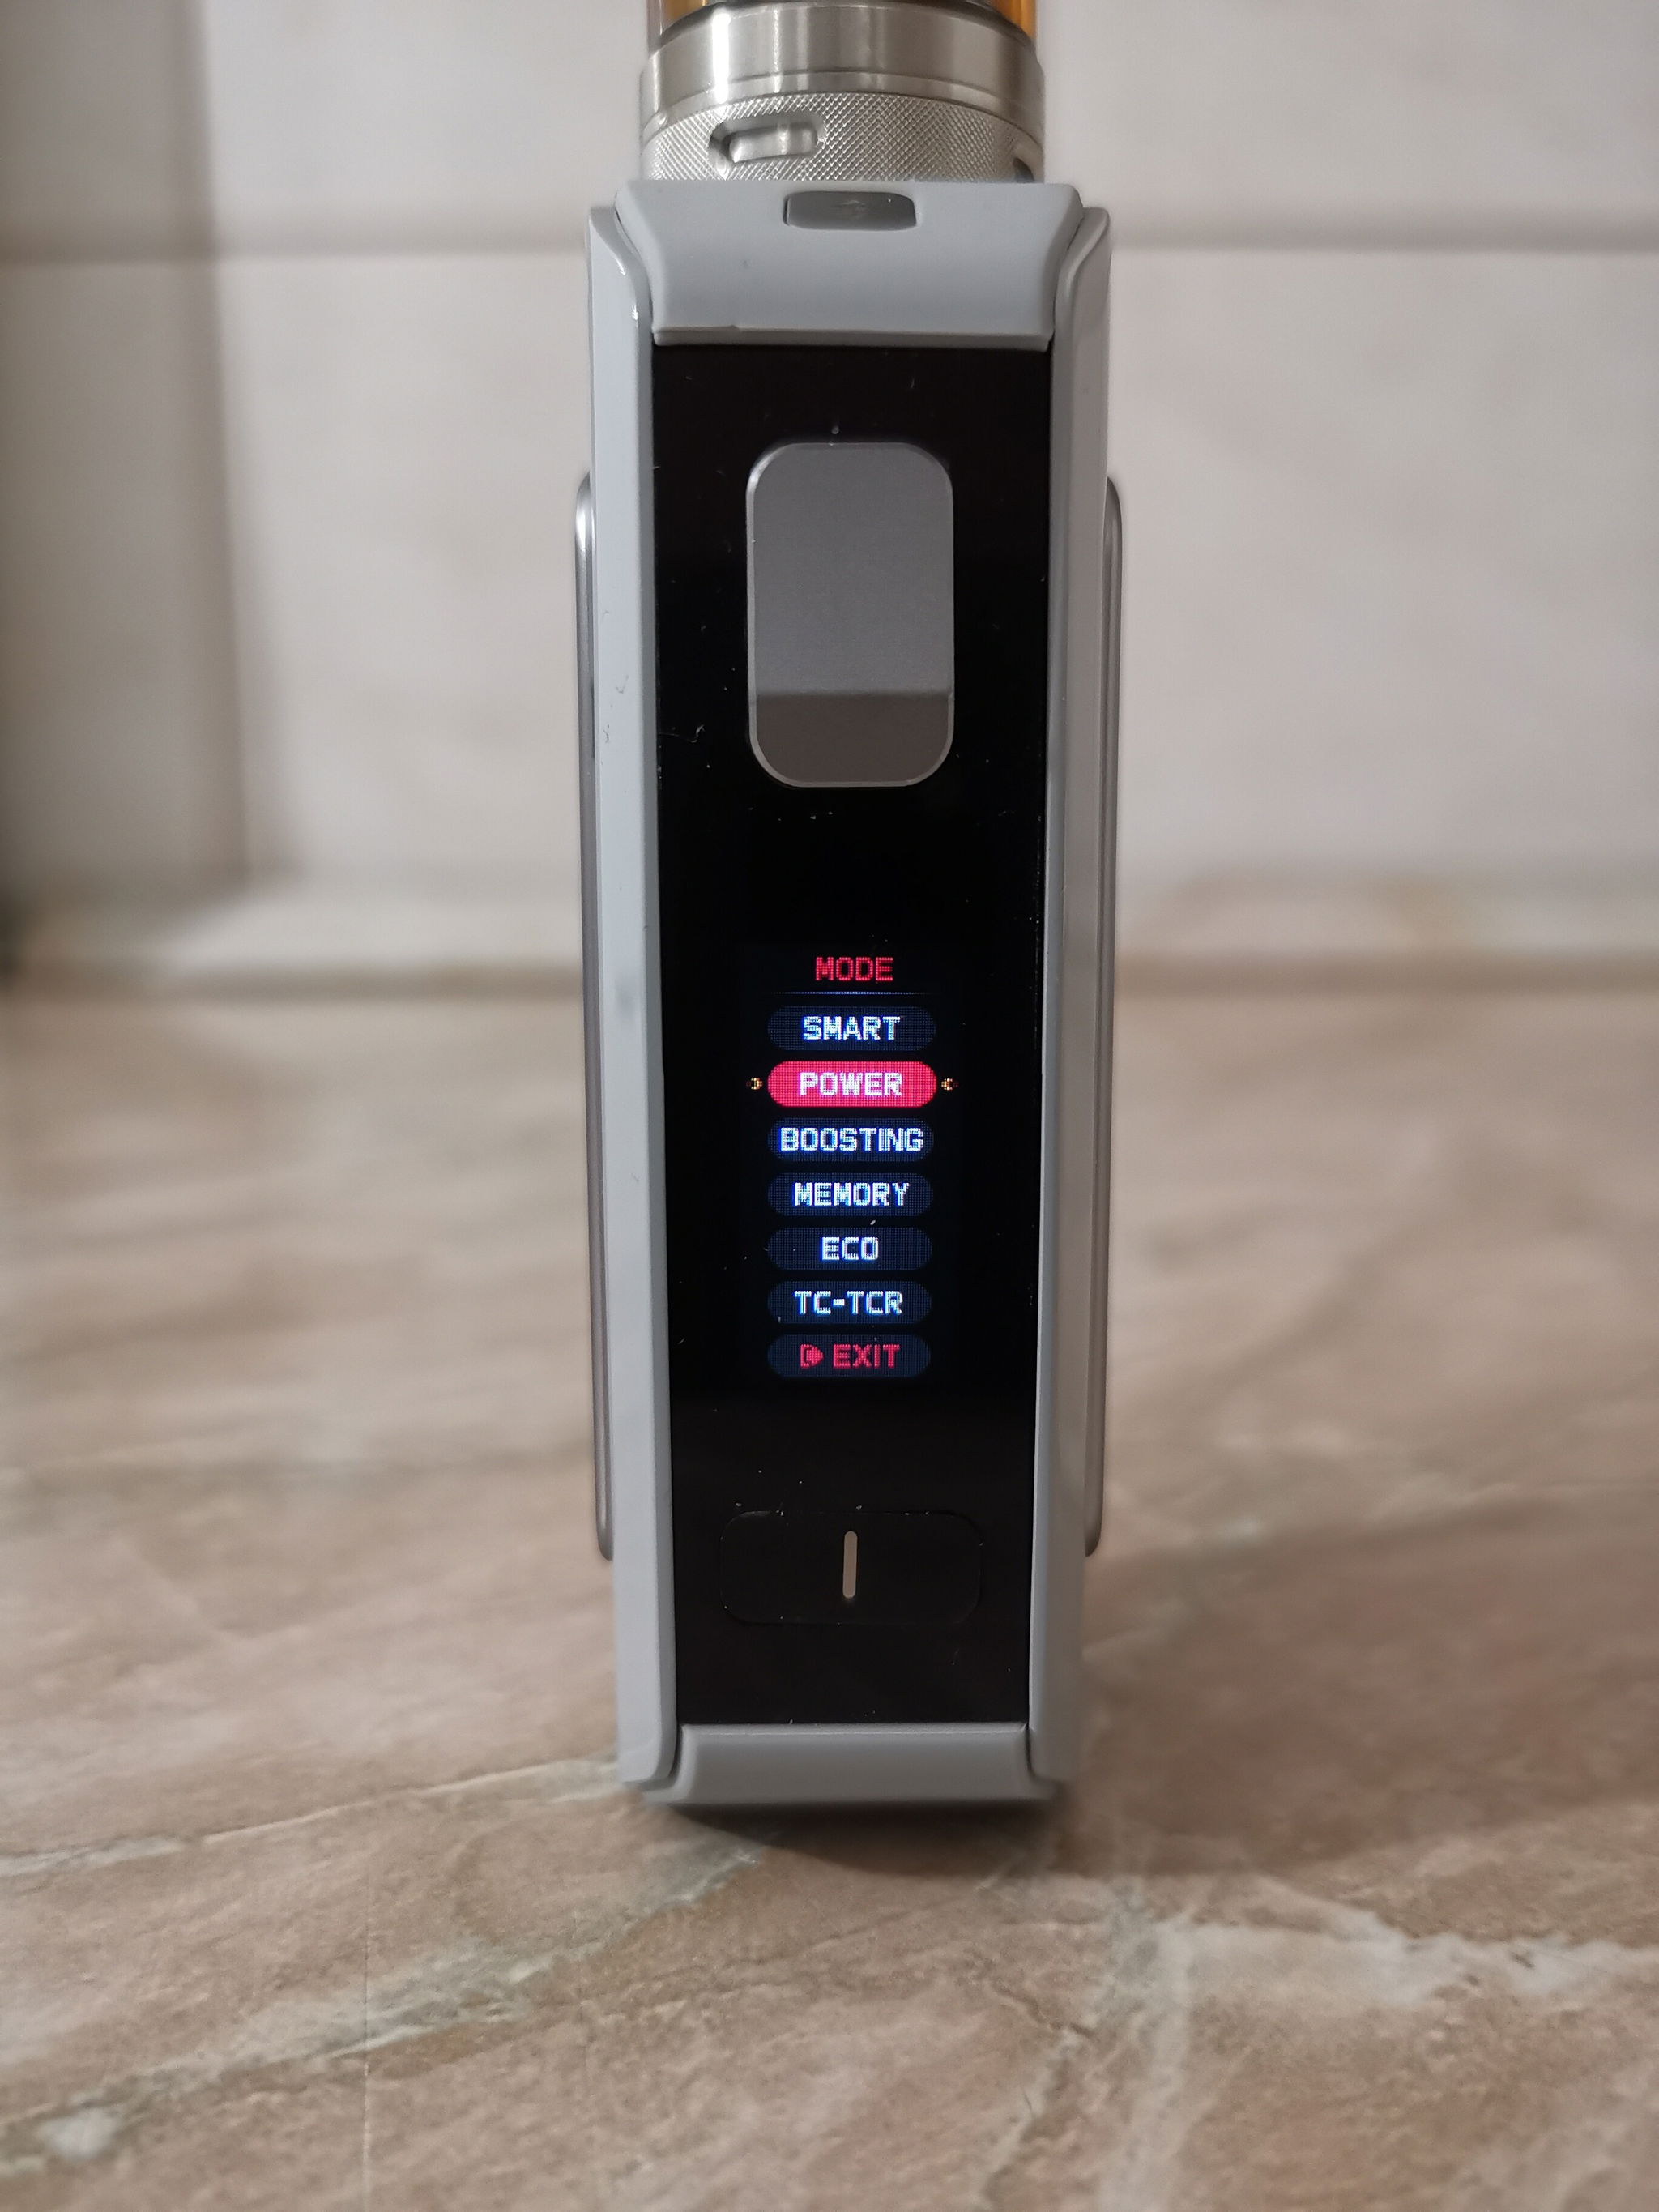

The third is the Puffs menu item, where we can check the puff count. If we want to reset it, we simply need to select the Reset option.

The fourth is the Colors menu item, which allows us to personalize the Solo 3’s menu system. These colors will appear everywhere, so the user interface will indeed be quite spectacular. We can choose from black-white, blue, orange, purple, and pink. The silver version comes with orange set by default.

The fifth is the Brightness menu item, which refers to the brightness level. The factory setting is 100% brightness, which I think is perfect. It’s not too bright even at 100%, almost as if there were no backlight, but if you’re observant, you can notice it’s there. Unfortunately, in natural light, only the white text is visible. Although, it’s true that once it’s set, people don’t usually fiddle with it.

The sixth and final one is the About menu item, which offers the version number and the Reset option, allowing us to restore the device to its factory settings.

Now, let’s take a look at the modes.
The first mode is Smart, which I don’t need to introduce; it sets the Wattage based on the Ohm in the usual way. The difference compared to the Legend 3 is that since this device has only one battery, it sends power to the coil less aggressively, which is absolutely positive for MTL and RDL. This way, the Smart mode is finally usable even with higher resistance.
The second mode is Power, which also works in the usual way; you just adjust the Wattage, and that’s it.
The third mode is Boosting, which is a slightly reimagined Bypass. You won’t experience much new, except perhaps it won’t be as powerful as in the dual-battery Legend 3 due to the single battery, but it’s enough for this purpose, and I had a perfect experience using it for RDL.
The fourth mode is Memory, where we get five memory slots to save tank settings. You can only recall a saved setting if the tank is working with the same resistance. In case of re-wicking or using a different resistance atomizer, you need to delete the memory slot and save the new setting again. I consider it a very good function because it eliminates the hassle of having multiple tanks for a single mod.
The fifth mode is Eco, which is the opposite of Boosting. It sends the most favorable voltage to the coil for the battery, so the battery won’t be overstressed, which is definitely a good thing.
The sixth mode is TC-TCR, which is more TCR than TC. If we choose this, we need to know the TCR value of our TC-compatible wire, as we must enter it before use. Unless your wire material is NiFe30, as its value is set by default. Don’t forget to set the Wattage either, as the factory setting is 50 Watts, which will likely be too much.

Due to its IP68 rating, it doesn’t scratch anywhere; only the film on the navigation buttons shows signs of use. The plexi on the display clearly shows that nothing is visible. Just like the Legend 3, the Solo 3 proves to be a truly durable device.

Now for the main part!
User Experience Report
Regarding external impacts, I can say the same as for the Legend 3 test: I couldn’t scratch it at all, and honestly, it did fall, though not from a great height, but neither fall affected it. I need to stop putting everything on the edge of the table! The buttons are firm, they don’t rattle, and their actuation point is found across the entire button, making it comfortable to use. However, I think the grip is better than the Legend 3’s, simply because it’s narrower, so it fits much better in the hand, almost disappearing into your palm. The padded back, under which the Smart sensor is located, makes the grip so comfortable that it’s more than just comfortable. Sticky dirt also refuses to adhere to the Solo 3’s surface, just as was characteristic of the Legend 3. I have no complaints about the 510 connector either. Those small ribs are sufficient to prevent the tank from getting stuck, but they don’t scratch the bottom of the tank at all. The three screws assure us that we are indeed talking about an indestructible gadget. Just as the battery door of the Legend 3 was difficult to close due to the gasket, the battery cap of the Solo 3 is also a bit harder to screw in, but only because there’s a substantial gasket there too, which is essential for the IP68 rating. I have absolutely no complaints about the device’s durability!
As for the AS Chip 4.0, it does and offers exactly the same as the Legend 3. The only difference is that since there’s one battery instead of two, certain modes operate at noticeably lower voltages, but this is completely natural.
Smart: In the usual way, it sets the Wattage based on resistance, which can, of course, be adjusted within certain limits. For a 1 Ohm resistance, this means the device set 12 Watts, which can be adjusted between 10-14 Watts. It powers the tanks less aggressively than the Legend 3, but you can get the most out of it with a more robust RDL setup, though battery life will suffer. In any case, it’s perfect for MTL and RDL.
Power: In the Legend 3 review, I mentioned a significant positive difference in experience because it has a pretty substantial preheat function built-in. The same applies to the Solo 3! The intensity shows that it’s absolutely not sluggish and the preheat definitely enhances the experience. Although it’s less than in its bigger sibling, it’s there, and that’s what matters.
Boosting: Or Bypass. We are fortunate to have a much friendlier mode compared to the Legend 3. With the Solo 3’s Boosting, a dual DL RTA is not mandatory, as its single-battery nature won’t lead to excessive scorching. However, don’t use this mode with a very tight MTL; rather, use it with RDL. There, it will definitely shine.
Memory: This works exactly the same as in the Legend 3. It remembers the resistance and the set wattage for it, but it only displays the wattage value, which you will see as a selection option within the mode. Of course, it re-measures the resistance here after recalling the setting, but it doesn’t save it, so it won’t interfere with the saved data. In all cases, it can only save the Power mode. This means, for example, if you press one of the memory slots in Eco mode with a certain resistance, it will save the resistance with the last set Wattage value in Power mode. So, this is really only good for Power mode. However, in terms of functionality, it works perfectly.Eco: As with Eco modes in other mods, this is characterized by using a lower power Boosting (Bypass). It allows the most favorable output power to the coil relative to the battery. I think this is really beneficial for the battery, and it can also offer something new in terms of experience.
TC-TCR: As I wrote, this is more TCR than TC, so you will definitely need the TCR value of the wire suitable for the given TC. It locks the resistance automatically, but we have to set the Wattage ourselves. With the Legend 3, I had a problem with TC-TCR where it noticeably reduced the power at around 20% battery charge; well, this problem does not exist with the Solo 3! Thus, we can say that the single-battery design has eliminated the only flaw of the AS Chip 4.0.
So, we can say that in terms of features, everything is unchanged compared to the Legend 3. I still have no complaints, neither about usability nor about the operation of the modes. Simply, everything is great! However, I noticed something that the Legend 3 also does, but I didn’t notice it then, so now we’ll touch a bit on the already well-known Touch Lock.
Touch Lock: I still love it! I think it’s the best Geekvape feature ever! There’s no better device lock than this! We can confidently forget about physically locking the mod, as Touch Lock is precisely for this purpose. If you don’t touch it, it locks all buttons; if you are holding it, it activates them. If we touch it, it senses our body heat, causing it to unlock. But now comes what I didn’t notice with the Legend 3, only with the Solo 3, though independently, both devices can do this. If we touch the back of it, it displays All buttons now unlocked, which in free translation means all buttons are unlocked. BUT! Even though the mod displays this, it won’t let you fire unless the fire button also senses our body heat! So, this is a kind of double protection, thanks to the bio-sensor fire button. Touch Lock will work well in winter if we have gloves that can transfer our body heat; if this is not met, unfortunately, we cannot handle the mod with gloves on! But for that time, we can even turn off Touch Lock, as it’s not a huge problem.
Overall, we can reach all modes quickly, and we can enter the menu quickly, making its use smooth. The display does not show the data in natural light, only the values displayed in white, but I think this is characteristic of almost all mods, so it’s not a negative, just a consequence of use. What bothered me a bit at first, but I’ve managed to get used to it, is the display of battery charge. The mod shows 5 bars, and next to it, it writes the battery status in %, but they omitted the % sign. This isn’t that important, but what was a bit more annoying for me was that it only displays the battery status every 10%, and it removes a bar every 20%. So, it starts from 100%, then indicates our status as 90, 80, 70, and so on. And one bar disappears every 20%. This is strange to me because the two displays work in completely opposite ways, and even though I know there’s about 1 hour of battery life left at 10%, I still can’t pinpoint the last puff. The situation was worse with the Legend 3 because there were only bars, no numerical display. I repeat, although this is adaptable, it was just a bit strange for me, but I eventually got used to it, so I really had no complaints about it. Well, now let’s get to the pros and cons.
Pros 
- IP68, or Tri-Proof. It can literally withstand all external impacts, so a superior lifespan can be expected.
- Solid buttons, 510 connector, and battery cap. All buttons are perfectly and firmly in place, and the pressure point for each is found under the entire button, making the device comfortable and smooth to use. The 510 connector is additionally reinforced with three screws, which means no matter what accident befalls the mod, it will certainly not be damaged. Although the battery cap can be a bit difficult to unscrew and screw in due to the seal, this is a very important aspect for IP68, so it’s not really a problem.
- Appropriate weight, comfortable grip. I was satisfied with the weight of the Legend 3, but that’s different in that it’s not heavy for a dual-battery mod, and the Solo 3 is even more so, not being a heavyweight player, which is why it won’t pull anything down wherever we place it. And due to its rounded design, it has a truly comfortable grip.
- Touch Lock This is still the coolest convenience feature ever built into a mod! With Touch Lock enabled, we can place it anywhere; it won’t get pressed and fire randomly because the heat sensor is at the core of the intelligent lock.
- AS Chip 4.0 Thanks to this chip, we get all the good things the Solo 3 can offer. It stably maintains and optimizes the output voltage, even with a low battery, so the flavor and vapor remain consistent until the end of use.
- Easy-to-use user interface. The menu system is extremely simple, fast, and smooth to use. Everything is easily accessible, and nothing is phrased complicatedly. The user interface itself is attractive, interactive, and can almost be called exciting. Simply great!
- Access to the menu even in a fully locked state. If the Touch Lock slows down a bit due to summer heat, or if our hands get so cold in winter that the fire button or Smart sensor doesn’t detect our body heat, we can simply turn it off, because despite the temporary stuttering, the Smart sensor is also sensitive to pressure, and from then on, we can easily enter the menu with the usual 3 quick presses of the fire button. Problem solved.
Cons 
- Slightly narrow, rounded base. The bottom of the mod, or its base, is roughly the size of the rim of the battery cap, with perhaps an extra 1-2mm, but that’s not much at all, so it can sometimes wobble. Although it’s still beautiful and good, they could have gone another 2mm in every direction, and then we wouldn’t even have to write down this small negative point! But oh well, because nothing is 100% perfect! Anyway, this isn’t a real problem; you just have to learn to put it down properly.
Finally, I can perhaps only say that what was narrow and heated up on the Legend 3 is no longer present at all on the Geekvape Aegis Solo 3. It’s very good, very beautiful, easy to use, does its job like a pro, and thanks to IP68, it will be a part of our daily lives for a very long time. The wobbling can be eliminated with a little attention. So, if you’re looking for a single-battery rugged mod, you’ve found it!
Thank you for reading! Have a nice day! ![]()


